Tangible Timer - Client Documentation
Overview
The Tangible Timer Plugin is designed to enhance the functionality of LearnDash by allowing administrators to manage and regulate the time that learners spend on courses. This plugin is essential for ensuring that learners fulfill course requirements adequately and helps in maintaining the quality and integrity of the educational content provided. It offers a set of features that enable administrators to set maximum time limits and customize responses based on user activity.
Features
The Tangible Timer Settings plugin includes several key features that enhance course management:
Time Tracking Options:
- Enable or disable time tracking on a course-by-course basis or globally across all courses.
- Set a specific maximum time limit for course engagement.
Customizable Time Limits:
- Define global course time limits to ensure users spend adequate time on learning activities.
- Implement daily or total course time limits to prevent burnout and ensure consistent engagement.
User Notifications:
- Customize messages for users who do not meet minimum time requirements or exceed maximum time limits.
- Automatically notify users of their time status with configurable alerts.
Administrative Control:
- Select actions to take when users reach time limits (for now it's only displaying a custom message).
- Add custom CSS classes for styling or functionality when certain time conditions are met.
Accessing Timer Settings
To access the timer settings:
- Log in to your WordPress admin panel.
- Navigate to the left sidebar and click on ‘Settings’.
- Select the ‘Tangible Timer Settings’.
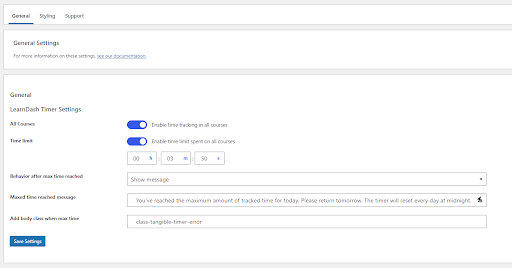
In the Timer Settings tab, administrators can configure the following options to suit their course management needs:
1. Enable Time Tracking
- Overall time tracking: Toggle to enable or disable time tracking for all courses.
- Course time tracking: Check specific courses to enable time tracking individually.

2. Time Limits
- Maximum time limit: Set the daily or total maximum time a student can spend on courses.
3. Behavior After Time Limits Reached
- Action on maximum time: Choose an action from the dropdown (for now, it can only show message).
- Custom messages: Edit the message displayed when time limits are reached.
Styling the Frontend Widget
Styling Settings Tab
In the Styling Settings tab, administrators can customize the appearance of the frontend widget used for displaying the time tracking bar.
- Primary and Secondary Background Colors: Set the background colors for the tracking bar.
- Primary and Secondary Text Colors: Choose colors for the text displayed on the tracking bar.
- Tracking and Minimum Time Labels: Customize the labels displayed on the tracking bar.
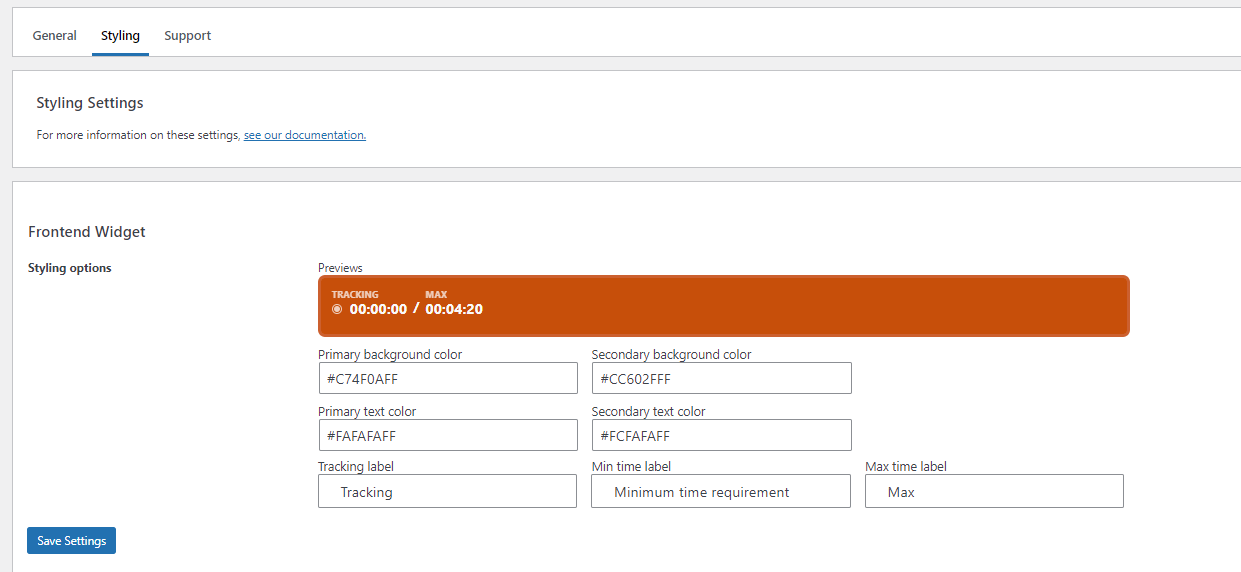
To configure these settings:
- Navigate to the ‘Styling’ tab under Timer Settings.
- Adjust the color settings using the color picker tools.
- Enter custom labels for the tracking and time limitation indicators.
- Preview the changes in the preview pane to ensure the widget appears as desired.
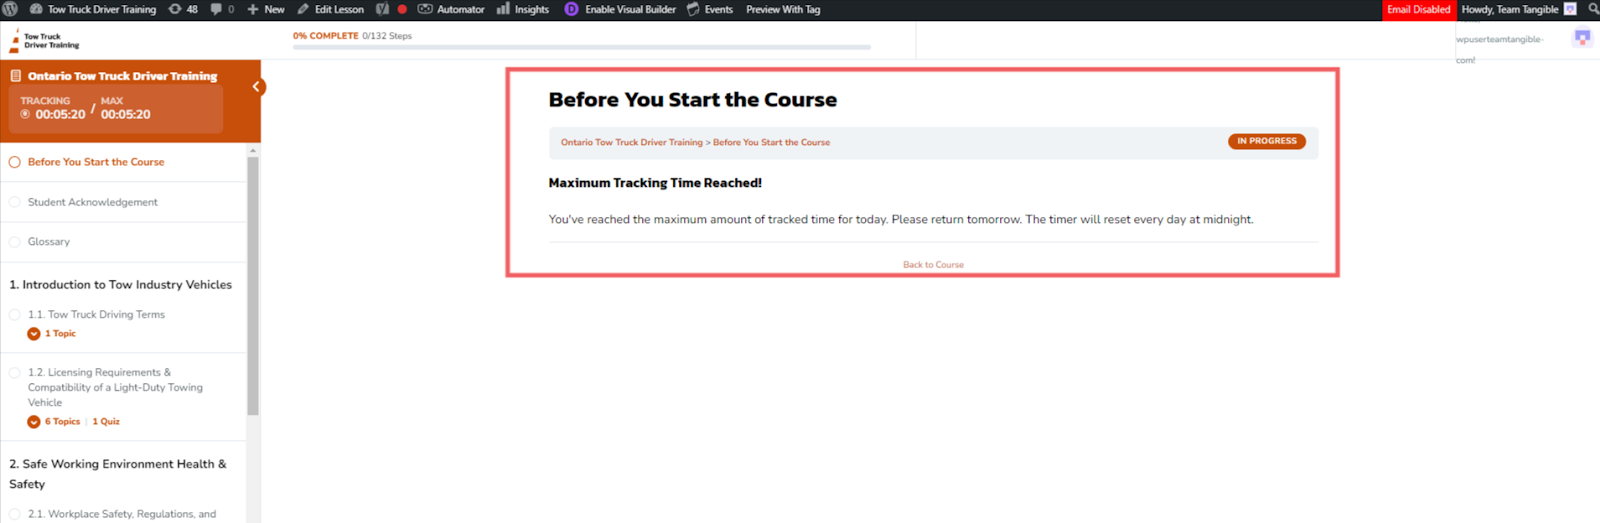
Frontend Display
The plugin modifies the course interface to include a time tracking bar at the top of the course page. This bar displays the current tracking time and the maximum time limit set for the course.
Frontend Display:
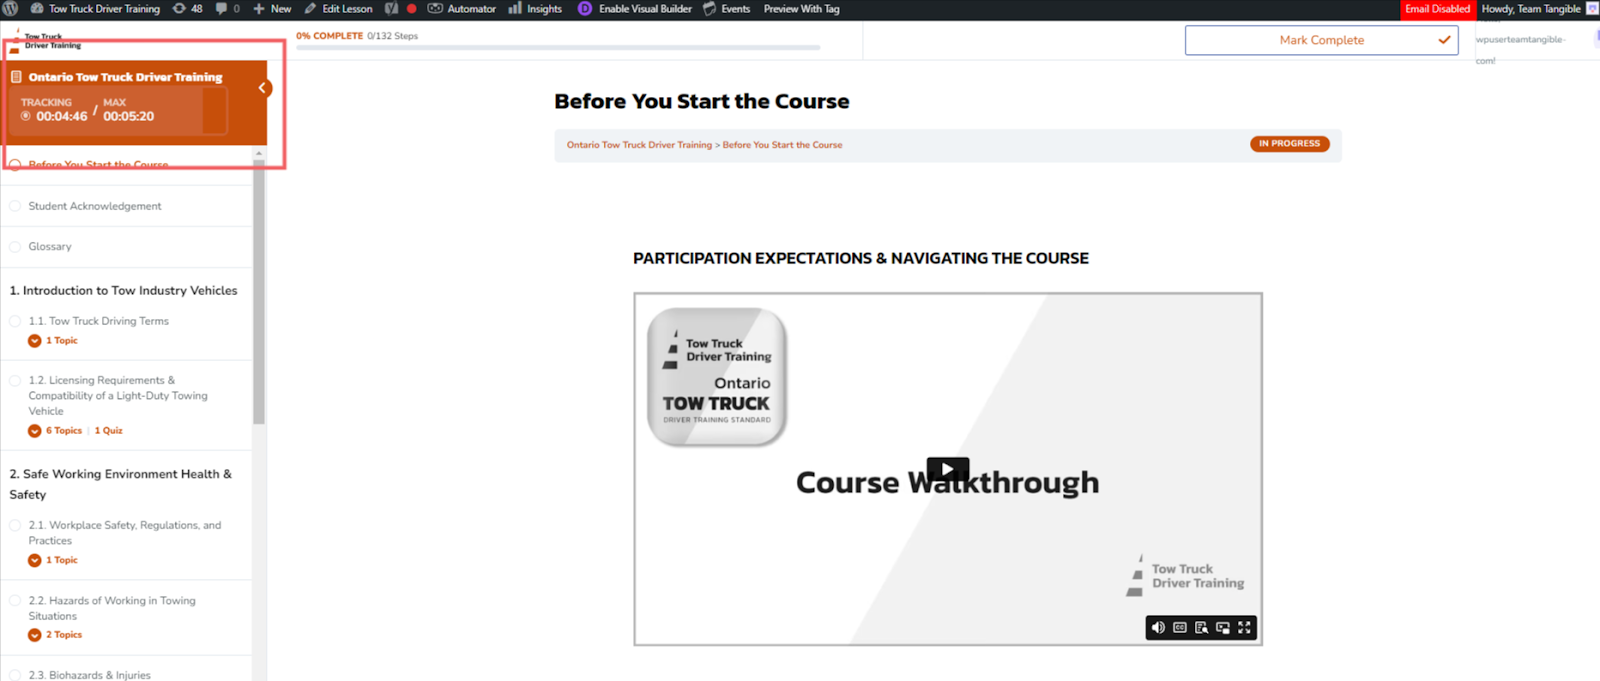
- Normal Tracking: When a user is within the learning state, the bar shows the elapsed time against the total allowed time.
- Maximum Time Reached: When the maximum tracking time is reached, the course page displays a notification alerting the user that they have reached the maximum amount of tracked time for the day and advises them to return the next day.
Saving Settings
Make sure to click the ‘Save Settings’ button to apply any changes made in the Timer Settings panel.