2.2 Completing Your Account Onboarding
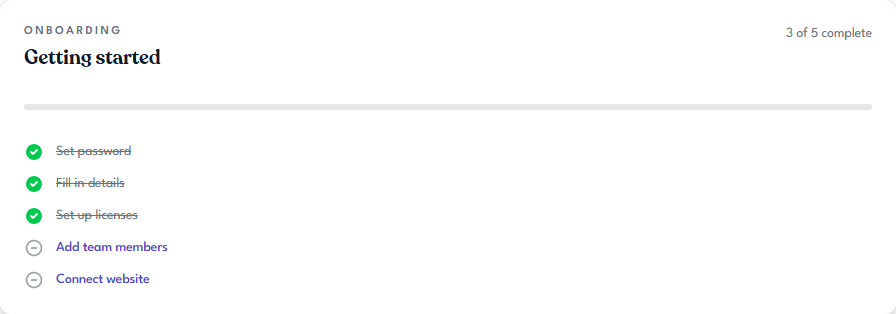
When you first sign in to Tangible Cloud, your dashboard shows a Getting started checklist at the top of the page. The checklist has five steps and a progress bar. As you take certain actions in Tangible Cloud, matching steps check themselves off automatically. Other steps require you to visit a specific page and complete an action yourself.
Where to find the checklist
The checklist lives on your Dashboard — the page you land on when you first sign in, and the one Tangible Cloud returns to when you click the Tangible logo at the top of the page. It sits at the top, above the other dashboard widgets.
The five steps
1. Set password
Checks off automatically when your account is active. By the time you reach your dashboard for the first time, this step is already complete — regardless of whether you signed in with a password, a passkey, or an email sign-in code.
2. Fill in details
Checks off automatically when your profile has a first name and last name. If you entered those during signup, this step is already complete. If not, go to Settings → Account, fill in both fields, and click Save Changes.
3. Set up licenses
Checks off automatically when your organization owns at least one active license. If you purchased a product during signup or have been added to an organization that already has active licenses, this step is already complete. An expired or revoked license doesn't count. Otherwise, follow the steps in Buying Your First Product.
4. Add team members
Links to your organization's Team Members page. This step stays open until at least one teammate accepts your invitation and becomes an active member of the organization. Sending the invite alone isn't enough — the step checks off when they join. If you use Tangible Cloud as a solo user, you can safely leave this step unchecked — it's optional and doesn't block anything else.
To complete this step, follow the steps in Inviting a Team Member.
5. Connect website
Links to your Websites page. This step stays open until at least one WordPress site has activated one of your licenses.
To complete this step, follow the steps in Activating a Plugin on Your Site.